Supercharged app development using SwiftUI
How we used SwiftUI to build an app for behavioral research

At Q42 we love to explore the latest technologies and see how we can apply it. In 2019 Apple introduced SwiftUI, and we are now using it more and more in our client projects. In 2020 we built our first app with it, SenseMath, for making mathematical graphs accessible to blind people. Check out this engineering blog post by my colleague Furkan on challenges we encountered while using SwiftUI for this iOS app.
Another client of us is the University of Groningen. Back in 2016, we helped them set up the Behapp platform for behavioral research studies. It is intended for medical scientific research into mental disorders, neural diseases and more kinds of behavioral studies.
The platform consists of an Android app and a backend. It is re-usable for many different studies. Researchers can onboard their participants and choose what data they would like to collect about them. After the participants have installed the app, it starts collecting data in the background. Researchers analyze this data to see patterns in behavior emerge. For example, for someone suffering from schizophrenia, a sudden change in how they use their phone (sending more or less messages) may indicate a relapse in their condition.
In 2021, it was time to update this platform with a fresh design by adding an iOS app. In this post I want to take you through three things I learned while developing this new iOS app.
SwiftUI versus UIKit
Whether you should use SwiftUI or UIKit for a new project is still the subject of many heated debates within the iOS community. Since there weren't so many different screens to Behapp, I figured it would be a safe bet to develop them in SwiftUI. The main components of the app are its onboarding/setup flow, and the questionnaire answering flow. The choice for SwiftUI has definitely paid off for us in terms of development speed (more on that in the next section).
However, when developing an app you may reach a point where you require more control over certain parts of your UI. You may need a completely custom animation. Or a UICollectionView where you manage the layout and loading. Or a custom refresh control.
Then you may hit a wall with SwiftUI and you may have to implement that feature using UIKit instead.
SwiftUI allows you to wrap a UIView or a UIViewController in a UIViewRepresentable or UIViewControllerRepresentable. In fact, most of Apple’s SwiftUI components are based on their UIKit counterparts. In Behapp I only needed to wrap a Lottie animation view and a UIDatePicker (since SwiftUI doesn’t come with a date picker component yet). I don’t see this as a failure of SwiftUI - quite the contrary. It’s really powerful that we can create a declarative, state-driven UI and still have that much control over views when it’s called for.
SwiftUI Previews
A headlining feature of SwiftUI is its live updating UI previews. Before SwiftUI, I’d write some user interface code, rebuild and launch the app, and then navigate through the app to test that piece of UI. Now, I just open a split view with my code on the left and the UI preview on the right of the screen. The preview updates automatically as I type. This speeds up the development cycle significantly!
When developing the app, I put the designs on one screen and Xcode on the other. As I am typing code, the UI preview keeps updating.
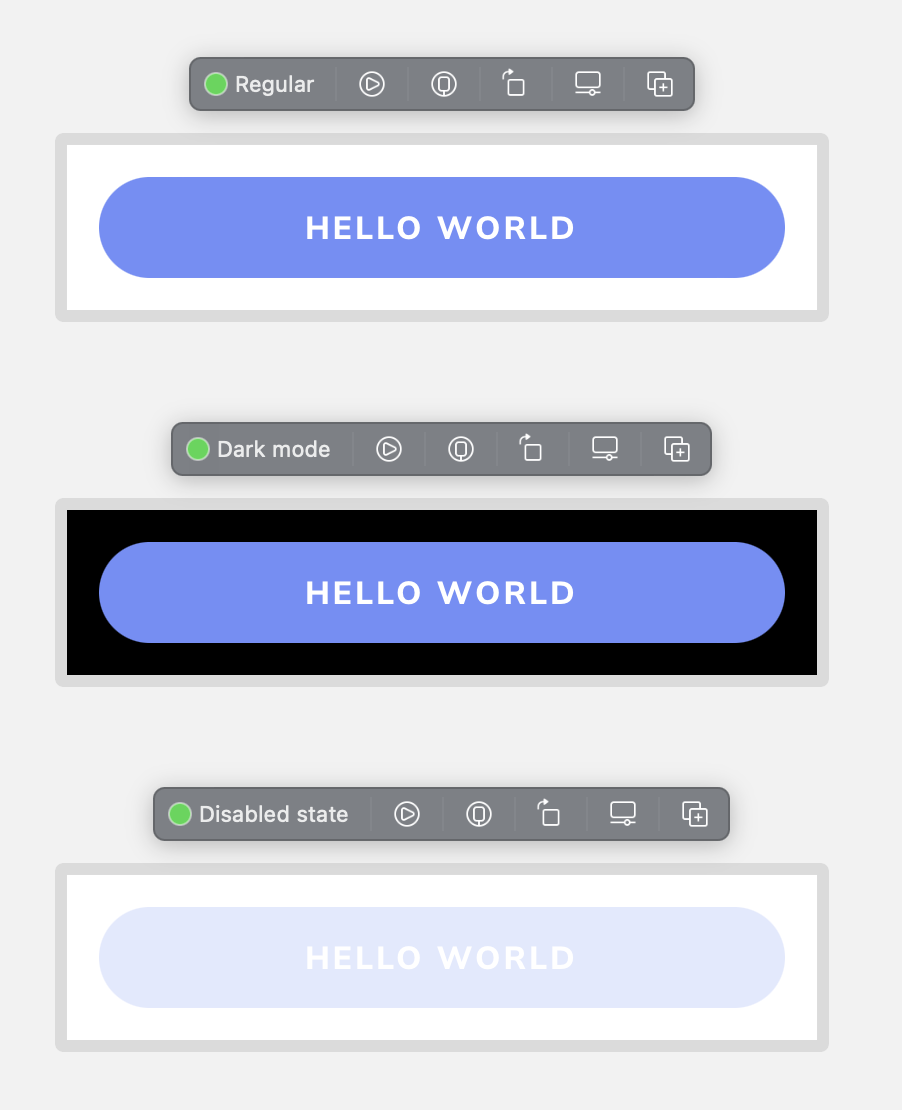
You can even have multiple previews for a view, to see it in different configurations or states. For example, you can view it at a different iPhone/iPad size, in light/dark mode, or with a different dynamic type size. That way, you can easily check that the view works properly in all of these situations.
For example, previewing a component like this button in all of its different states/configurations:

SwiftUI and JetPack Compose
Meanwhile, the Behapp Android app was also getting updated with the new design. My colleague Thijs decided to use JetPack Compose for this. It is the Android equivalent of SwiftUI. The two frameworks use the same design patterns, since they are both declarative layout frameworks. It turns out that they also provide pretty much the same features to developers:
- They are well integrated into the respective development tools (Xcode and Android Studio).
- They both support (one or more) live previews and interactive previews.
The shift towards declarative layout frameworks allows teams to build native apps much faster than before. It also lowers the barrier to entry for developers who are used to React or React Native to start developing iOS and Android apps.
Privacy and security
Behapp collects sensitive data about users, like their location history. It is important that we protect the user’s privacy and treat their data with care.
Firstly, there is a consent and permission flow in the app. The user must consent to take part in the research and is presented with the privacy policy. The location and notification permission screens clearly explain the purpose of data collection. Most importantly, users are able to say “no” to location and/or notification permissions and the app will still be usable. Whenever possible, users of the app should be able to opt out of unnecessary data access and still have a (at least partially) usable app. Apple says this in their App Store Review Guidelines.
Next, the app encrypts the data from the moment it is collected. It uses an asymmetric encryption scheme for this: the “sealed box” from libsodium. The data is encrypted using the public key of the researcher of the study. This means that only a specific researcher is able to decrypt the data using their private key, and no one else. We as developers of the Behapp platform can’t access this data, even if we wanted to.
🇳🇱 👋 Hey Dutchies!
Even tussendoor... we zoeken nieuwe Q'ers!
Getting through App Review
While we were developing the app, Apple’s 2021 Tech Talks were taking place. These were online sessions with Apple engineers and designers that you could book. We had a session with someone from the App Review team. We pitched the concept of the app and showed some of the designs to explain the purpose.
Our main questions:
- Is our app for (medical) scientific research allowed on the App Store, or must it be distributed to our participants in some other way?
- Is our encryption which uses libsodium permitted? Since the App Store always asks if your app uses proprietary encryption, I figured it might be an issue.
Fortunately, the answer to both of these questions was yes! Research apps are definitely allowed on the App Store. And the encryption from libsodium that we use is allowed as well, because it is a public standard and not a proprietary form of encryption. If it were proprietary though, it would be classified as weaponry by the United States Customs Department and we would need to fill out some extra paperwork to get it through review. [1]
We also got some useful feedback regarding privacy and consent:
- Get informed consent from the user for the study.
- Have good purpose strings that explain why certain permissions are needed.
- The user should be able to opt out of location sharing, notifications or both.
We designed a consent screen and added it to the onboarding. And we paid extra attention to get the permission screens in the flow right.
When the time came to submit the app to the App Store, we got through it on the first submission, without a hitch!
I definitely recommend chatting with Apple before or during the design/development of your app if you have the chance. It really helps identify issues ahead of time. And it is included in your Apple Developer membership, so it doesn’t cost you anything extra!
You can book sessions with Apple designers to review your app’s design, with developers to ask questions about code or technical things, or even with the marketing team to talk about marketing your app. You can book such sessions during WWDC, or whenever Apple announces upcoming Tech Talks slots.
Three things I’ve learned
Summarizing, these were my takeaways from this project.
- The SwiftUI and JetPack Compose frameworks let us develop apps way more quickly. Working with components and previews makes maintaining two apps more cost efficient.
- Have a session with Apple during your development process if you’re able to. It really helped us out by identifying potential problems.
- You should consider privacy and security at every phase of building your app (ideation, design and development). It’s not something that you can “add on” at the end.
Footnotes
- If you want to know why, listen to this cool podcast episode about the Crypto Wars from the 90’s.
Do you also love working with new technologies like SwiftUI? Check our job vacancies (in Dutch) at werkenbij.q42.nl!