Supporting “Sign in with Apple” in your UIKit app
How to implement iOS 13's new privacy sign-in tool to quickly onboard new users.


Leverage the new features in the AuthorizationServices framework to quickly onboard new users
The announcement of Sign in with Apple at the WWDC19 Keynote event drew a lot of attention from journalists and Apple users alike. Sign in with Apple provides a secure way for users to log in to your app or website using their Apple ID. Apple announced it will require apps that support other Single Sign On mechanisms to also support Sign in with Apple, so now might not be a bad time to get a feel of what that entails. In this post I’ll share my experiences integrating Sign in with Apple into an existing app.
Prerequisites
Some prerequisites before you get started: the Sign in with Apple APIs require iOS 13.0, so make sure you have the new Xcode 11 beta installed on your machine. I had no luck configuring Sign in with Apple in an enterprise team, so you might want to switch to a non-enterprise team before starting. I’m not sure whether this is a deliberate design decision, or if support for enterprise teams might follow at some later date. Additionally, I found that you need to have the admin role in your development team. Lastly, you will need to read and accept the latest Apple Developer License Agreement. Xcode will not run your app until you do.
Adding the button to your app
Let’s begin by making the necessary code changes. In the Signing & Capabilities tab of your Xcode project file, click the ‘+’ button and add the Sign in with Apple capability. In the General tab, add a reference to AuthenticationServices.framework under Framework, Libraries, and Embedded content. With the AuthenticationServices framework available, you can now create an instance of the Sign in with Apple button and add it to your view. The ASAuthorizationAppleIDButton is a UIControl like any other, so you’re free to embed it any way you like. Our app, like most apps, shows a vertical list of login options, so it makes sense to use a UIStackView:
With these changes in place we can run the app and see the button in action.
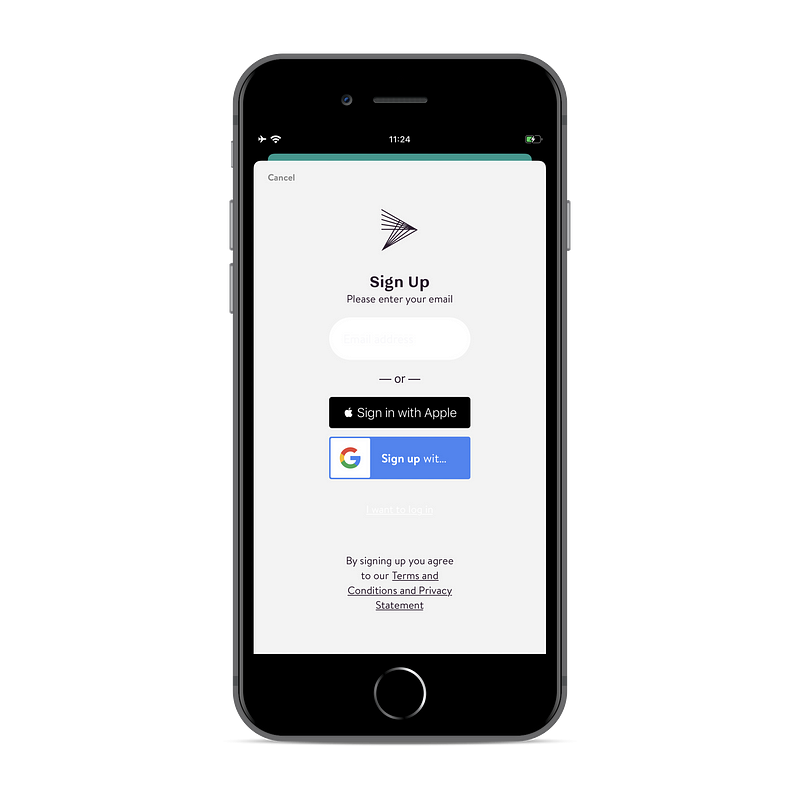
The ASAuthorizationAppleIDButton has a width constraint that is required and that forces the button to be of a particular size. As you can see in the screenshot above, this forces our Sign up with Google button to shrink and truncate the text. The required width constraint prevents us from stretching the Sign in with Apple button without introducing constraint conflicts, so we will need to work with our designers to update the UI of this screen.
Per Apple’s Human Interface Guidelines I placed the Sign in with Apple button on top.
Position a Sign In with Apple button correctly in relation to other sign-in buttons. In a stacked layout, place the Sign In with Apple button above the other buttons.
I expect Apple to enforce this requirement in their App Review process, but we’ll know for sure as soon as the first apps that support this feature start shipping. The Human Interface Guidelines also provide guidance on the way the Sign in with Apple button can be styled.
Doing authorization requests
When the button is pressed, we can issue an authorization request using ASAuthorizationAppleIDProvider.
We set self as presentationContextProvider and delegate for the ASAuthorizationController. Let’s see what that entails.
ASPresentationAnchor is a type alias for UIWindow. iOS refers to the presentationContextProvider to determine in which UIWindow the authorization interface should be presented. iOS 13 introduces support for multiple windows, so you need to instruct iOS which window it should use.
The delegate on ASAuthorizationController is used to handle the result of the authorization request.
My implementation for these two protocols looks like this:
My app has one window (for now), so I can follow Apple’s reference project and return the window that my view lives in. In my implementation of the ASAuthorizationControllerDelegate I just print the result. In an actual implementation you would take the provided credentials and create an account in your backend system or log the user in. You would also handle the authorizationController(controller: ASAuthorizationController, didCompleteWithError error: Error) and inform the user.
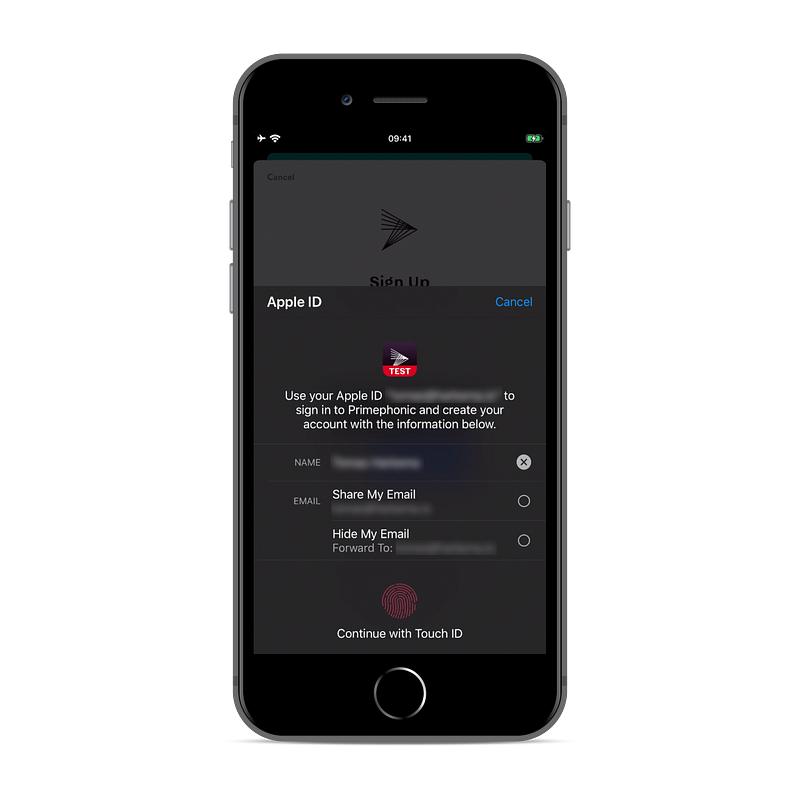
If you now run the app, you should be presented with the authorization UI when you click the Sign in with Apple button.
Configuring your Apple developer account
When you attempt to sign in, you’ll see an AUTH_ALERT_SIGN_UP_NOT_COMPLETED error message. Signing in won’t actually work until you create a key with Sign in with Apple enabled in your developer account. Refer to these instructions to do so. Please note: if you don’t see the Sign in with Apple feature listed when you create a key, you’re probably in an Enterprise team. Just creating the key should suffice, you will only need to download it when you want to support Sign in with Apple from somewhere other than your app.
At this point you should be able to sign in and you should see credentials being printed in the console. If you chose to hide your email address, you’ll see an email address on the privaterelay.appleid.com domain. If you get an AKAuthenticationError 7026, then you probably forgot to add the Sign in with Apple capability.
On subsequent sign in attempts, the user will be asked if they want to sign in again with the same account. Note that in this situation it is assumed that the user is already known in your backend system. This means that only the user identifier will be returned, all other credentials will not be available.

You might want to reset an existing account to test the first sign in experience again. In the Settings app of your iOS device, tap your account in the Apple ID header, proceed to Password & security. Find your app under Applications using your Apple ID and swipe to delete it.
Mailing your users through Apple’s relay
In order to send emails to the Apple relay address, your email address or domain must be whitelisted. This ensures that third parties that get a hold of the email address will not be able to send you emails. You’ll find the whitelist under ‘More’ in the side menu on the Certificates, Identifiers & Profiles page of your developer account. If you don’t see the menu item you’re probably in an Enterprise Team. If you do see the item, but don’t see any inputs when you click ‘configure’, then you’re not an admin of the team. After you add individual email addresses to the whitelist, you should now be able to email the user through Apple’s relay. Check your spam folder if you don’t see any emails coming in: my first few attempts ended up in my spam folder.
My two cents
I’m pleasantly surprised with how little effort it takes to get the basics of Sign in with Apple up and running, but I am curious to see what the experience will be like when you run it in production. A lot can be said about the way Apple strong-arms companies to support Sign in with Apple. It remains to be seen whether regulators will take issue with this move, but in the meantime Apple owes it to all iOS developers to at least make the process of supporting Sign in with Apple as painless as possible.
So what’s next? Now that you have Sign in with Apple working in your iOS app, you might want to look at supporting it on the web and in your Android app. There’s lots more in Apple’s documentation pages, so go nuts!
Check out our other WWDC19 blog posts on https://engineering.q42.nl/tag/wwdc.