Our team's blessing: a living style guide
A case study on how to maintain large websites by using a living style guide


Maintaining large websites with a web team (developers, designers and client) can be challenging. When improving a website, you want the visual style and interaction to stay coherent. Also, you want to make sure every page continues to work as intended, even after a code refactor. However, a website gets more and more pages, components, states, variants and exceptions over the years. So keeping an overview is quite hard, when just browsing around doesn’t work anymore.
While building the website nederlandseloterij.nl for the Dutch Lottery, we found a solution to this problem: a living style guide. Below I explain the benefits of such a setup.
The Dutch Lottery website
The website Nederlandseloterij.nl has mainly two functions:
- Promotion of the seven Dutch lottery sub-brands (with their separate websites).
- User account management. Users have one account with a balance which can be used to spend the money on the seven sub-brand websites.
Our team roughly consists of three front end developers, two back end developers, one project lead, one visual designer, one interaction designer and a product owner.
The tech setup for the project
The project contains a website, CMS and API part, all built with ASP.NET Core. Vue is used for the front end with its ‘inline-template’ feature for server side rendering with ASP.NET’s Razor Views.
From the beginning, we used Brad Frost’s atomic design approach for setting up the front end. All the features are built following the atomic design principles, which means pages are built with layered components. N.B. Using atomic design is not necessarily needed for having a living style guide, but it can work to your advantage.
The Living style guide setup (with atomic design)
The style guide contains two things:
- a page for every atomic design category
- a page for all the pages on the website
To be more concrete, the structure looks like this:
Atomic design categories
- atoms
- molecules
- organisms
- templates
- grid
- fonts
Pages
- Homepage
- Contentpage (variant 1)
- Contentpage (variant 2)
- Promotion page
- Account page (state 1)
- Account page (state 2)
- etc.
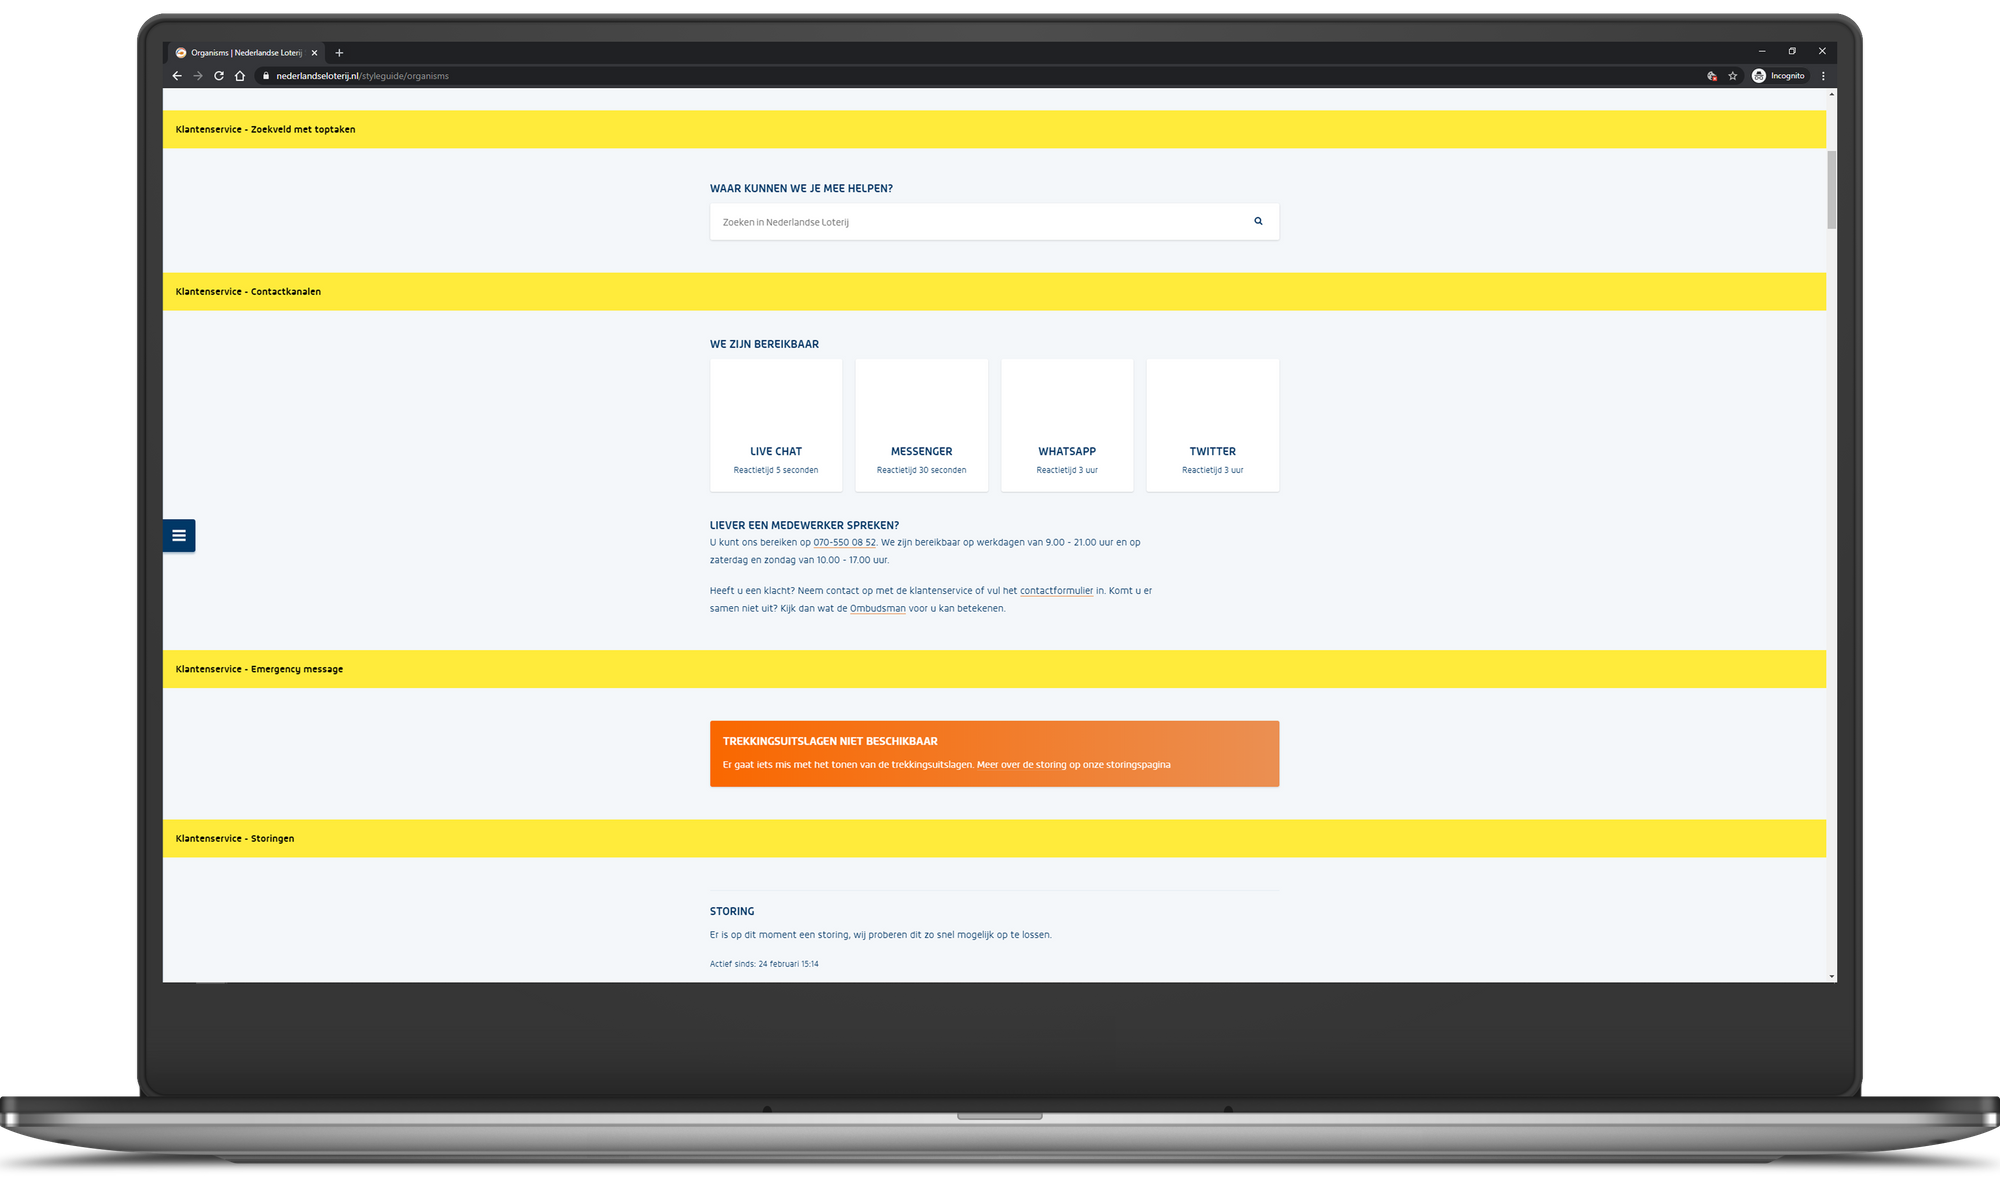
Every atomic design category (atoms, molecules, organisms) has its page and contains all the components from that category. Divided with the name of the component:
Every page has its static page filled with content. So you don’t have to be logged in for an example to see an account page.
You can take a look for yourself, as the living style guide of Nederlandseloterij.nl is public. Further down I explain how this is done technically.
The advantages of a living style guide
A living style guide has several advantages. Most importantly, it offers every team member an overview of the web project. Also, checking pull requests is faster and refactoring becomes easier.
Better website overview
Having one list of all the components and pages of a website, gives the whole team an overview of what’s out there. This is especially true for a large project like the Nederlandse Loterij website with lots of pages, a logged-in area and many page states. Knowing what’s already out there helps all people involved.
A developer knows which components exist. Time can be saved for reproducing states (eg. test if the styling is correct).
A designer knows what style is used where on the website. Especially for designers, it can be a lot of work to maintain a design style guide for lots of pages for multiple years.
The product owner has a product overview which helps as input to make better decisions. Our product owner even uses it to check how a component should look like without A/B test changes.
And as a bonus: onboarding new team members is easy. Just look a the living style guide as a start to see what the website is all about.
Fast checking of pull requests
When a pull request is checked, we always test if the committed code is working correctly. Most of the time this means having a certain state of the application and start testing all cases. A living style guide can often speed this up.
For example, imagine the case where a developer changed the styling of a CMSable component which is only present on a page when a user is logged in with a specific state of a user account. It can take a lot of time to recreate this situation. First, you need to have a user account with a certain setup. Second, you have to make sure that the component is present on a page with test data in the CMS.
Having good test data on a living style guide makes this way easier to test. A static page on the style guide containing that component with test data, is all you need for verifying UI changes.
Easy refactoring
When maintaining a large website, you can’t escape refactoring. Especially when the visual style is updated after a few years. The style guide for the website of the Dutch Lottery has helped us a lot in cases where components are used on multiple pages. Switching pages on the style guide for checking if it looks correct, was way easier than creating the right states via the CMS for a lot of pages.
Challenges of using a living style guide
As stated above, the benefits of a living styleguide are many. But of course, there are also challenges. Those lie mainly in taking the time to create and maintain a complete overview.
It takes time
In my experience, time can be a limiting factor for creating and maintaining a living style guide. Every new component that is created, must be added to the style guide with correct test data. This means extra development time.
A living style guide saves a team time in the long run, but it can be hard to persuade a team at the start of a project for creating one. One way to approach this problem is to start with the ‘pages’ on the style guide only (so not the separate components on pages). This is less work compared to the component pages. Most of the time, this gets the team convinced. After that you can still add the component pages.
It only works well when it’s complete
If you want to have an overview of your website as a team, the living style guide must be complete. Every component and page must be there. After all, every team member will assume that all she or he sees is all there is. Making sure that every addition or change is maintained on the living style guide can be difficult. It needs discipline from the developers.
What helps us for new components, is to start building the components on the style guide pages. This also helps to make the component standalone.
In our GitHub workflow, we added a checklist in the pull request with one checkbox: “It is present on the style guide with test data?”. In practice, it can still be overlooked, but at least it keeps coming back for every new pull request you make.
🇳🇱 👋 Hey Dutchies!
Even tussendoor... we zoeken nieuwe Q'ers!
Tips for making the most out of a living style guide
So, presuming you agree that a living style guide is worthwile, how do you make the best use of it?
Use ‘real’ test data
For having a good style guide, which corresponds to the actual website, there should be ‘real’ test data. Only having images of cats and lorum ipsum texts doesn’t give you the certainty the content looks the way it should be. Take some time to get high-quality images from the client and create some text. In case you create a new version of an existing website, you can just copy the text.
Re-use views as much as possible
We re-use the partial views for displaying the components on the style guide page as much as possible. This makes sure that changes to the component are directly visible on both the website and the style guide.
In code this looks like:
<h2>Special shop page header - for an actionflow</h2>

@{
  var actionPage = ActionPageTestData.GetActionPage();
}
@await Html.PartialAsync("Organisms/SpecialShopPageHeader", new SpecialShopPageHeaderViewModel
{
  BackgroundImage = actionPage.BackgroundImage,
  LogoImage = actionPage.LogoImage
  ...
})
The other pages on the style guide are pages on the website with test data. There are separate controllers actions on the style guide controller. Each action serves the Razor view of a page.
A style guide page with test data looks like this:
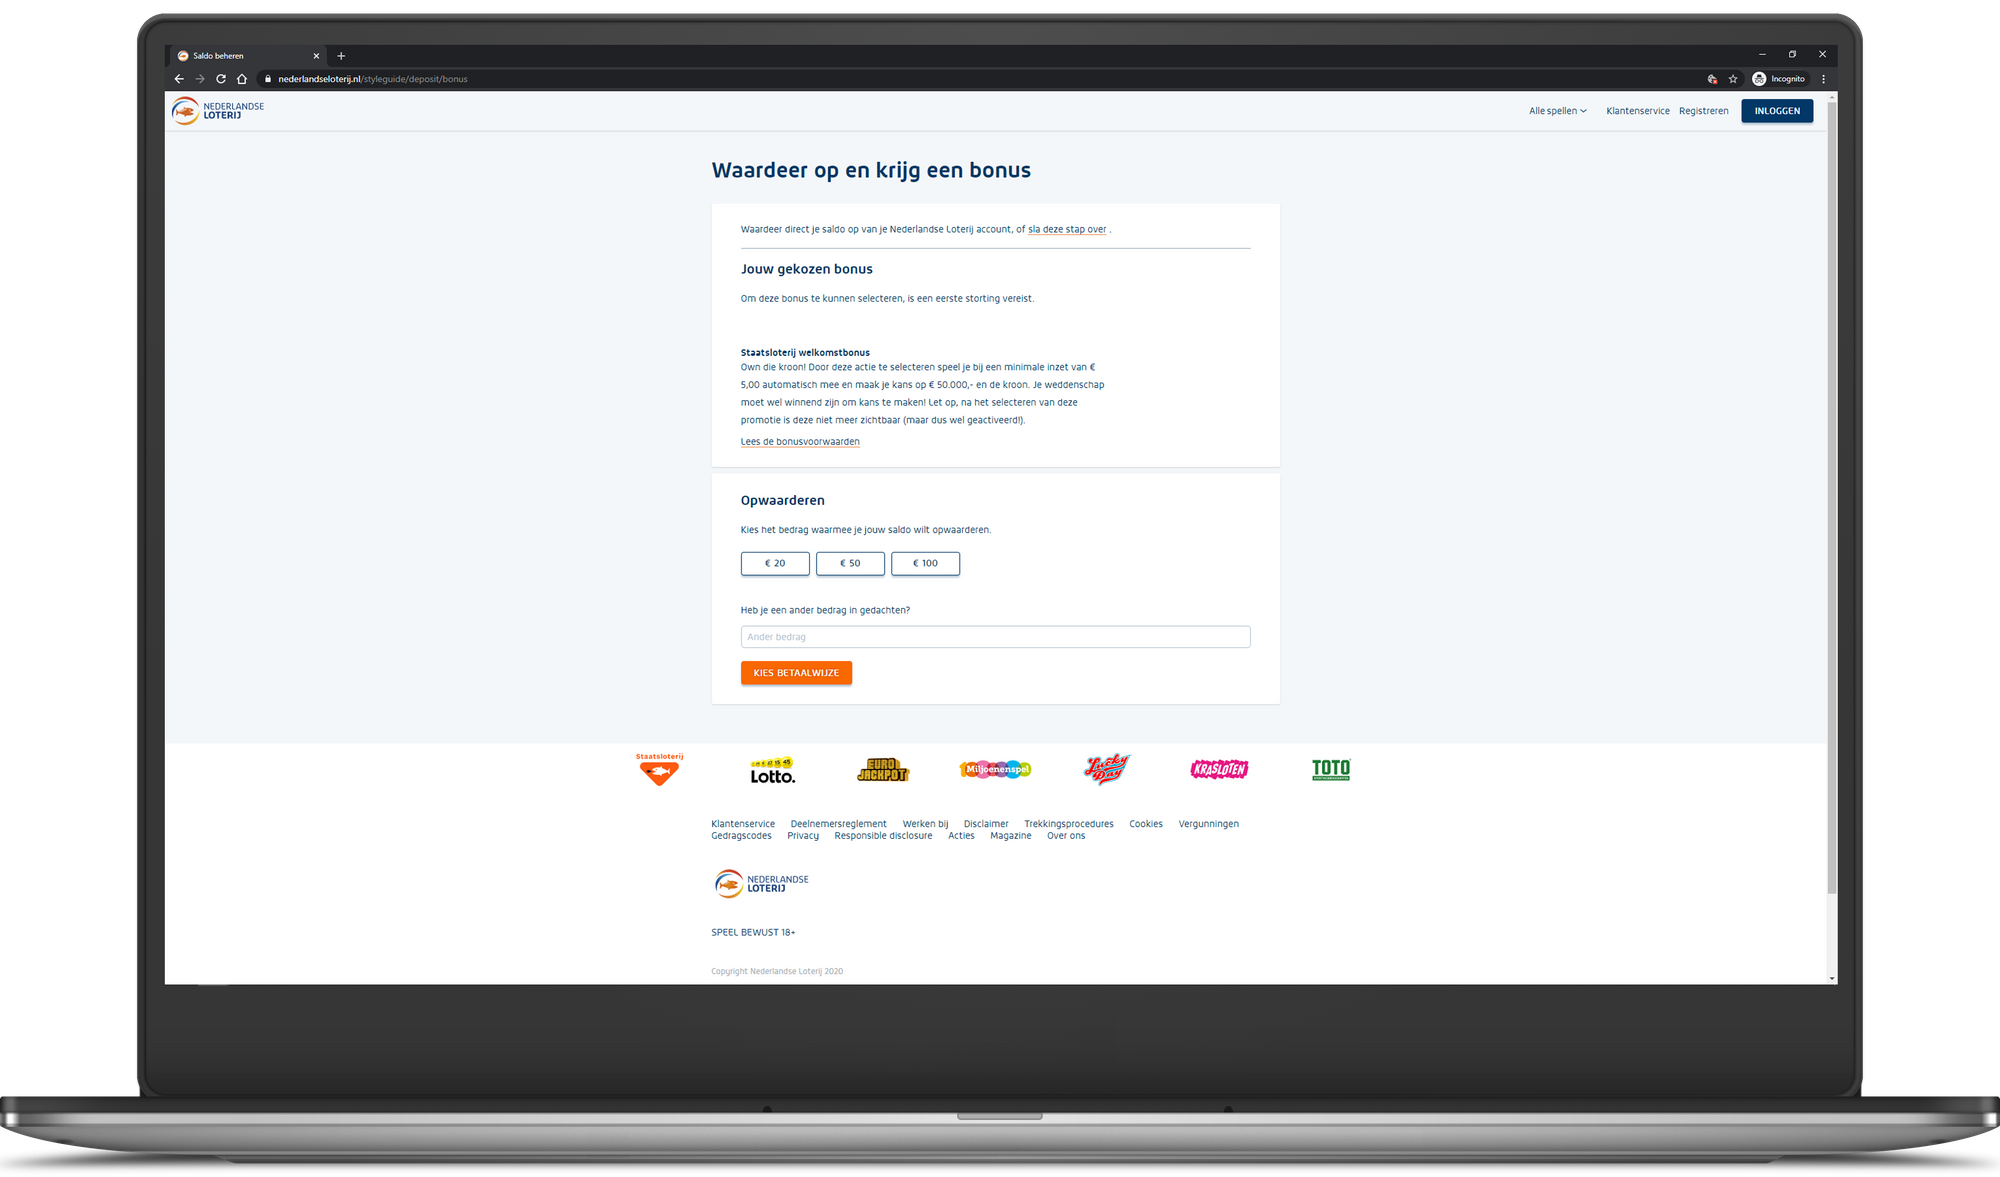
In code this looks like the following:
[Route("styleguide/promotions")]
public IActionResult PromotionsOverview(bool hasPromotions)
{
  var page = ActionsContentpageTestData.GetPromotionsOverviewPage(hasPromotions);
  return View("~/Views/ContentPage/Index.cshtml", page);
}
Seperate CMS and style guide source
In the setup we have both a CMS and style guide with the same test data. Every team member has its local database with test data for the CMS. As a developer you can change the data for your local version of the website with the CMS. The style guide isn’t affected by these changes and keeps having the same data. This also works on production.
Wrapping up
Creating a living style guide takes some effort, but it can really accelerate the web team. Everyone in the team gets a better overview of the website, that is easily accessible via a public url. This doesn’t only save time but it is also great input for making your website even better.
If you haven’t got a living style guide for your project and want to start with it, the easiest way is to create the style guide pages and start building new components on it from now on. From there on you can add existing components one by one and involve the designers and client as well. Starting with a blank page and adding components to it will do, but you can always improve the visual appearance. Check out http://styleguides.io for inspiration on existing (living) style guides. Are you a product owner that needs arguments to introduce a style guide in your project? Read this article in Dutch by my colleague Guido.
I’m curious to hear about your experiences. You can send me an email or check me out on LinkedIn and Twitter.
Are you a developer that loves to work on such large projects? Then do check our front end and other job vacancies (in Dutch) at https://werkenbij.q42.nl!